Thursday, January 6, 2011

1/144 Unicorn Gundam Chapter 1

EDIT: I have it on Kriz's, of KrizCreations, authority that Testers Sprays are really bad for painting your models. I'll post my opinions once I finish this guy. I just wanted to caution anyone who read this post and might be interested in getting Testers Sprays.


Got this kit for Christmas and finally got around to doing some painting. I didn't really know what I wanted to do with it, I didn't want to do a straight build. So I decided to paint the white and clear red runners different colors. This is a bit different from how I normally paint. I usually build the model, then tape the pieces to a flat surface and spray paint them. This time I'm painting straight onto the runners becuse I'm feeling a little lazy and wanted to try a different painting approach. Another thing that should be noted is that I'm using some different paints then usual. I normally order tamiya sprays from Burbanks House of Hobbys. A few days ago I went to Micheal's (a pretty common craft store in the states) to get a new hobby knife and found out that they sell Tester model paints. I wanted to give them a go considering I could buy the locally which is a plus.

I chose to do a Flat Olive Drab on the white pieces, which is a spray enamel paint. Then silver (Diamond Dust) on the clear red pieces, which is a Lacquer Paint. I wasn't too sure how these would work but so far I'm pleased with the results.


I started by taping the runners to some coat hangers. Then I took them out side and sprayed them down. Then hung them to dry. Keep in mind that they only have one coat applied right now. I still have to spray another and then make sure I got all the crevasses.


I think it will look pretty cool when its done. I also want to try and sponge on some paint chipping effects later. It would be good practice because I would like to do some of those effects on the Zeong Bear.


-------------------------------

Tuesday, January 4, 2011

Speaking of resin kits...

E2046.com is selling a lot of cool resin kits with FREE SHIPPING! Its on select items, I imagine they're trying to get rid of some kits to make room for new ones, but there are some cool ones none the less. Including the one I bought. I got the AGX-04 Gerbera Tetra. I'm not too familiar with this suit but it looks pretty cool and was around 50$ when I purchased it (now 40$ with free shipping). Its just my luck to buy a kit and then three weeks later its being sold for ten bucks less T_T. I'll get over it, haha. It doesn't say that there are region restrictions on the offer, so If you're looking into trying your first resin kit, like me, this might be a good chance to get a decent kit for a good price. Because some of these kits get EXPENSIVE. Just click the link below to see the free shipping items.

RESIN KITS

If anyone wants to buy me the MSZ-006 Hyper Z that'd be cool, hihi.


Monday, January 3, 2011

Resin Kits

So around Christmas I made the plunge and ordered a resin kit. I've been into building Gundam models since I was around 11. But it wasn't until a few months ago I realized the popularity of modifying and painting the kits. Around the same time I stumbled across Matt Tomczek's Blog, who for those of you who have seen his work know how awesome his resin kits are. I know resin kits are a bit different from the standard Bandai snap-fit models. I'd like to try my hand at it and see if I can make anything look decent. The reason I'm really interested in them is the variety of variant models. Because resin kits aren't made by Bandai some models have design differences from the originals, often looking a lot better in my opinion. I just wanted to share some of my favorite resin kits that I have come across. I'll have another post on the kit I ordered when I get it.

Just click on the images if you're interested in learning more about the models.

Sunday, January 2, 2011

General Tricks

Here are some simple tricks that help me out when I'm modding and cleaning my models. If you're like me, you don't have great access to a lot of specific tools. So in many cases I make my own or use what I have in different ways.

1) Poor Man's Sanding Pad:

I have a nice set of files and some different grain sand papers. But sometimes I sort of need something in the middle. I like how the files have an edge so I can get right up against something but they can be too rough and sometimes scrape away more then I want. Sand paper is great for cleaning and polishing surfaces but doesn't have a edge for tight spaces. So I came up with a solution. Just take a thin strip of scrap pla plate and fold your sand paper around it. This will give you a good balance of precision and scraping power for cleaning tight areas. The great thing about it, is you can cut and shape the pla plate that you have the sand paper wrapped around to be thinner or thicker so it fits you specific needs. And that's the Poor Mans Sanding Pad.


2) Pla Pipe Cutting Without a Pipe Cutter

Some of the thicker pla pipes can become a bit sloppy if you simply try to cut through them with your side cutters. It will cut through just fine but the pressure applied will cause the edge you're cutting to warp. You'll end up with one end shaped like an oval instead of a circle. To some modelers this isn't that big a deal. But, I got tired of trying to reshape the ends of the pipes after cutting them. So I came up with this solution. After you mark where you want to cut the pipe. Take you side cutters and put the on the line like you're about to cut through it. Then add slight pressure with the side cutters as you start to turn the pipe. Continue to increase the pressure with the side cutters until the pipe is scored enough to break off or it falls off on it's own. You might have to sand the edges but the end of the pipe should be nice a circular.


Stay tuned, more to come....


------------------------------------------------------------------------------------------------

Saturday, January 1, 2011

Scratch Building: Thrusters

In this post I'm going to do my best to show how I created a scratch built set of Thrusters for my Zeong Bear model. I'm relatively knowledgeable when it comes to modding, however this is my first attempt at scratch building. So the techniques and notes I share are what I found to work best for me. Just know that there are many ways to go about building anything really and the way that I do it may not be the best way for you. But, hopefully you'll get something from this tutorial.

I thought I'd start off by sharing a list of tools and materials that I used.

TOOLS:
-Side Cutters (a must)
-Modeler's Cement (another must)
-Hobby Knife (a modder's katana)
-Sand Paper (600 and 320 grain)
-File set
-Good pair of scissors
-Tweezers
-Drill bits (roughly 1mm and 2mm)
-Metal Spike (I don't know the technical name for it but its a sculptor's tool)

Supplies
-Pla Plate (.75mm and 2mm)
-Pla Tube (assortment of sizes)
-Some thruster verniers ( I'm using some from the 1/144 Zeong and some from 1/144 Methuss)
-Poly Caps
-Possibly some other option parts
-And of course some good old fashion creativity (I buy mine off Ebay)

All right, so the first thing that needs to be done is to design what you want to build. You want to create something that will mesh well with the accompanying model. Best thing to do is to draw a couple ideas on some small pieces of paper and hold them up to your model to see how it will look. Keep in mind it doesn't have to be very elaborate, start with basic shapes and angles and go from there. I already drew out a shape I liked and cut some pla.


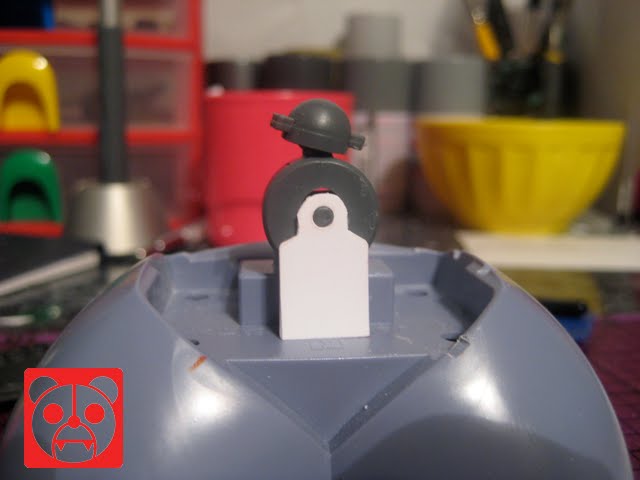
I'm going to make two large thrusters out of these shapes that sit on either side of some fuel tanks that will attach to the back of the model. I'll get to the fuel tanks later. The next thing I did, was to go through some of my scrap poly caps to find a way to attach the thrusters to the fuel tanks. If you have built a decent amount of Gunpla in the past you should have a decent amount of left over poly caps. It is always a good idea to keep not only the spare poly caps but also the spare pla plate you'll be cutting up. You never know when you might have a use for them.


I think these guys will work. Now I just have to find something that fits in them. I went through some of my pla tubing to see if any of them fit. Luckily, one size seemed to work which was roughly 3mm wide. I'll have to do some sanding on the tube though to get it to fit in snug.


Before I go and attach these poly caps to those thruster pla plates I need to clean them up a bit. For me, prepping your mods and pla plate is a big key in making it successful. Because once its glued to something else it can be a lot more difficult to sand and clean up the surface. So I'm going to go ahead and sand and clean up the surface and edges a bit.


The next thing I want to do is figure out where I want these things to attach to the fuel tanks and where the poly caps should go. This is very important because depending on where I put them the articulation may be poor. This is a good time to hold the thruster pla back up to the model to help make the decision. While I have a rough idea of where to put the poly caps I'm going to cut out some pla pieces to hold the poly caps. Then I outline an area to cut out for the poly caps.


NOTE: these holes will be hidden so I wasn't too concerned with cleaning them up. I did sand them a bit.

Now with the other pla thruster pieces, I cut some thick (roughly 5mm) pla tube to act as supports for the corners of the thrusters. I did check and measure in proportions with the model how thick I want these thrusters and then cut the pla tube accordingly. In order to make sure all the tubes were the same length, I taped them together and then filed each end. After a while, and a little testing, I added some more tubes for more support.


While I let the glue dry on that, I went back to attaching the poly caps to the others side of the thrusters that had the holes in them. I ended up cutting some 2mm thick pla pieces out to attach to the sides of the poly caps so they would have more area to be glued to the inside of the thrusters. Ideally, I would have liked to use angle pla but I had none. After I glued them onto the thruster pla pieces I tested the strength of the poly caps to make sure everything stayed together. The last thing I'd want is to finish and then the poly cap falls out of place. This seemed to work fine.


I will update this soon with what is going on down below here.


That's all for now, I'll add on to this post once I get more work done.
Thanks for reading.


---------------------------------

Friday, December 31, 2010

Mishaps and the New Year.


Well earlier today I was disappointed when I broke my hobby knife. Yeah. I knew it was a piece of junk and this just proved it haha. It was actually quite dangerous because not only did I break the knife but the blade broke and sent a sharp shard of metal into the air. Luckily I got away without a cut. Its still usable but probably not as safe or reliable as before. So I'll be getting a new knife in 2011.

Anyway, I hope everyone has a safe and Happy New Year. I'll leave you with a little preview of the Zeong Bear Chapter 3.


Wednesday, December 29, 2010

Zeong Bear Chapter 2

PREVIOUS CHAPTER

I'm making decent progress on certain areas as far as modding goes. I got some nice piping detail on the fuel tanks. It was as easy as stabbing a hole in the sharpie and then inserting some pla tubes.


I did some more Armor Trimming on the forearms too. Still need to clean it up a bit but yo uget the idea.


I also started another little project too. Can you guess what these are going to be?


If you guessed scratch built back pack you are correct. I'm only going to show little bits here and there of the back pack build cause for one I'm not sure if I'll get it done and two, I'd like to make a tutorial from it once the project is done. I got a lot of inspiration and ideas from a blogger named Funakatown who has some great scratch built stuff: FUNAKATOWN. Here's something to give you an idea of what it will look like.


Although it's a bit ambitious for me, I also started working on bettering the articulation in the torso. Hopefully with what I do, it should be able to turn and lean from side to side. Because I'm not afraid to use parts from my other models, I tore the ankle of the 00 Raiser apart and that is what will be used for the motion. Then I cut some strips from the black part so the mounts could fit and the black part could come out for painting and such.


Lastly, I started to look at paints and settled on three. They're pretty simple, plus I have some left over grey paint from the Z2 Zabanya to use too.


Thanks for dropping by!


NEXT CHAPTER
Related Posts Plugin for WordPress, Blogger...